Generating Images with OpenAI's gpt-image-1
🎨 How to Generate Images with OpenAI's gpt-image-1
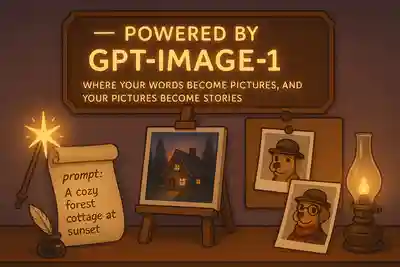
If you've ever wanted to turn a story or idea into a visual scene using AI, OpenAI’s new gpt-image-1 model makes that easier and more powerful than ever. Here’s how we use it in our own project, StoryGPT, to create beautiful illustrations from text—and even enhance them with character images.
🖼️ Step 1: Prepare Your Prompt
Just like GPT text models, gpt-image-1 needs a descriptive prompt. For example:
A cozy forest cottage at sunset, glowing windows, surrounded by tall trees.
The better your prompt, the better your image. Add mood, time of day, style—whatever matters.
🧙♂️ Step 2: Add Entity Images (Optional but Awesome)
Let’s say you already have a character image (e.g. a dog with a hat). You can upload it as base64 and use it as a visual reference.
Then, you can extend it like this:
"Add the following to the image: the dog has a red scarf and stands on two legs."
That way, the model builds on top of the original image rather than starting from scratch.
📦 Step 3: Call the API
There are two modes:
🧠 Text-only prompt:
client.images.generate(
    model="gpt-image-1",
    prompt="A futuristic city skyline at night with flying cars",
    size="1024x1024",
    quality="low",
    n=1
)
🖼️ Edit with image inputs (like adding to characters):
httpx.post(
    "https://api.openai.com/v1/images/edits",
    headers={"Authorization": f"Bearer {API_KEY}"},
    data={
        "prompt": "Add magical glowing eyes to the character",
        "model": "gpt-image-1",
        "size": "1024x1024",
        "quality": "low"
    },
    files=[("image[]", ("dog.png", open("dog.png", "rb"), "image/png"))]
)
The result will include a base64 image you can display, store, or save to disk.
✅ That’s It!
You can now generate visuals for your characters, settings, or entire scenes. In StoryGPT, we use this to bring generated tales to life—character by character, page by page.
Try it yourself and give your stories a face!
🧪 Full Working Example – Image Generation with gpt-image-1
This script requires:
openaipackage (pip install openai)httpxfor sending multipart image uploads (pip install httpx)- An OpenAI API key in your environment as
OPENAI_API_KEY
import os
import base64
import httpx
from openai import OpenAI

## Make sure this is set in your env
OPENAI_API_KEY = os.environ["OPENAI_API_KEY"]

## Simple image generation using just a text prompt
def generate_image_from_prompt(prompt: str):
    client = OpenAI()
    response = client.images.generate(
        model="gpt-image-1",
        prompt=prompt,
        size="1024x1024",
        quality="low",
        n=1,
    )
    image_b64 = response.data[0].b64_json
    save_image(image_b64, "image_text_only.png")


## Image generation using an uploaded base64 image and an enhanced prompt
def generate_image_with_entity(image_path: str, prompt: str):
    with open(image_path, "rb") as f:
        image_bytes = f.read()

    files = [
        ("image[]", (os.path.basename(image_path), image_bytes, "image/png"))
    ]

    data = {
        "prompt": prompt,
        "model": "gpt-image-1",
        "size": "1024x1024",
        "quality": "low",
    }

    headers = {
        "Authorization": f"Bearer {OPENAI_API_KEY}",
    }

    response = httpx.post(
        "https://api.openai.com/v1/images/edits",
        headers=headers,
        data=data,
        files=files,
        timeout=60,
    )

    if response.status_code != 200:
        raise Exception(f"Image generation failed: {response.text}")

    image_b64 = response.json()["data"][0]["b64_json"]
    save_image(image_b64, "image_with_entity.png")


def save_image(image_b64: str, filename: str):
    os.makedirs("out_images", exist_ok=True)
    path = os.path.join("out_images", filename)
    with open(path, "wb") as f:
        f.write(base64.b64decode(image_b64))
    print(f"✅ Saved image to: {path}")


if __name__ == "__main__":
    # Mode 1: Generate from prompt
    print("🔮 Generating from prompt only...")
    generate_image_from_prompt("A fairytale castle on a floating island under a purple sky")

    # Mode 2: Generate from prompt + entity image
    print("🖼️ Generating with entity reference...")
    generate_image_with_entity(
        image_path="dog.png",  # replace with your actual image
        prompt="Add a red scarf and a monocle to the dog"
    )
🧠 Summary
generate_image_from_prompt(...)→ only needs textgenerate_image_with_entity(...)→ includes your custom character or reference image- Results are saved in the
out_images/folder